Step 1: Clean Your Incubator One Week in Advance
- Objective: Ensure your incubator is clean and free from contaminants that could harm the eggs.
- Instructions:
- Mix a 25% bleach solution with water.
- Use a damp rag to gently clean the incubator.
- Avoid using harsh cleaning products with ammonia.
- Pro Tip: Focus on all interior surfaces and trays where the eggs will be placed.
Step 2: Set Up Your Incubator Two Days Before Arrival of the Eggs
- Objective: Find the ideal location for your incubator to ensure a stable environment.
- Instructions:
- Place the incubator at least 6 inches away from edges to prevent accidents.
- Keep it out of direct sunlight and away from drafts.
- Ensure the surrounding area maintains at least 25°C.
- Place on a sturdy, level surface.
- Connect to a reliable electrical outlet that remains on.
- Pro Tip: Regularly check the surrounding environment for any changes in temperature or airflow.
Step 3: Ensure Correct Temperature and Humidity
- Objective: Set the ideal conditions inside the incubator for egg development.
- Instructions:
- For forced air incubators: Maintain a temperature between 37.5 – 38.0°C.
- For still air incubators: Keep a temperature of 38.0 -38.5°C.
- Adjust the humidity to at least 60%.
- Pro Tip: Use a reliable thermometer and hygrometer to monitor these conditions.
Step 4: Leave the Incubator On
- Objective: Stabilize the incubator’s internal environment before the eggs arrive.
- Instructions: Keep the incubator running to ensure it reaches and maintains the set temperature and humidity.
- Pro Tip: Check the incubator several times a day to monitor stability.
Step 5: Plan for Continuous Egg Care
- Objective: Arrange for consistent monitoring and care of the eggs, especially during weekends.
- Instructions: Designate a responsible person to care for the eggs during weekends or in your absence.
- Pro Tip: Create a care schedule or checklist to ensure no step is missed.
By following these steps, you’ll create the optimal environment for your eggs to develop and hatch successfully. Remember, consistency and attention to detail are key in the incubation process.
-
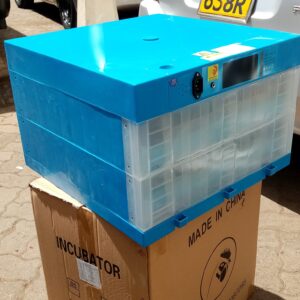
![incubator components]() 128 Eggs Incubator with Automatic Turning and Humidity Control High Capacity Chicken Incubator for Hatching Eggs with LED Candle LightKSh20,000.00
128 Eggs Incubator with Automatic Turning and Humidity Control High Capacity Chicken Incubator for Hatching Eggs with LED Candle LightKSh20,000.00 -
![Incubators for Hatching Eggs 128 Eggs Digital Incubator Heat Preservation and Water Retention One-Click Heat Preservation Suitable for Chickens, Ducks, Quails]() Incubators for Hatching Eggs 128 Eggs Digital Incubator Heat Preservation and Water Retention One-Click Heat Preservation Suitable for Chickens, Ducks, QuailsKSh20,000.00
Incubators for Hatching Eggs 128 Eggs Digital Incubator Heat Preservation and Water Retention One-Click Heat Preservation Suitable for Chickens, Ducks, QuailsKSh20,000.00 -
![128 Egg Incubator, Automatic Digital Poultry Hatching Machine with Auto Egg Turn & Temp Control & Humidit, LED High-Efficiency Poultry Hatcher for Chicken, Duck, Quail, Bird,]() 128 Egg Incubator, Automatic Digital Poultry Hatching Machine with Auto Egg Turn & Temp Control & Humidit, LED High-Efficiency Poultry Hatcher for Chicken, Duck, Quail, Bird,KSh20,000.00
128 Egg Incubator, Automatic Digital Poultry Hatching Machine with Auto Egg Turn & Temp Control & Humidit, LED High-Efficiency Poultry Hatcher for Chicken, Duck, Quail, Bird,KSh20,000.00 -
![Egg Incubator 128 Eggs Fully Automatic Poultry Hatcher Machine with Led Candler Egg Turning and Temperature Control for Hatching Chicken Duck Goose Quail]() Egg Incubator 128 Eggs Fully Automatic Poultry Hatcher Machine with Led Candler Egg Turning and Temperature Control for Hatching Chicken Duck Goose QuailKSh20,000.00
Egg Incubator 128 Eggs Fully Automatic Poultry Hatcher Machine with Led Candler Egg Turning and Temperature Control for Hatching Chicken Duck Goose QuailKSh20,000.00 -
![Egg Incubator 128 Egg, Poultry Hatcher, With Fully Automatic Egg Turning And Humidity Control,Chicken Poultry Hatcher Egg Hatcher,For Chickens Ducks Goose Birds]() Egg Incubator 128 Egg, Poultry Hatcher, With Fully Automatic Egg Turning And Humidity Control,Chicken Poultry Hatcher Egg Hatcher,For Chickens Ducks Goose BirdsKSh20,000.00
Egg Incubator 128 Egg, Poultry Hatcher, With Fully Automatic Egg Turning And Humidity Control,Chicken Poultry Hatcher Egg Hatcher,For Chickens Ducks Goose BirdsKSh20,000.00 -
![128 Eggs Digital Incubator Fully Automatic with Intelligent Temperature and Humidity Control Turning Poultry General Purpose for Chickens Ducks Bird Poultry]() 128 Eggs Digital Incubator Fully Automatic with Intelligent Temperature and Humidity Control Turning Poultry General Purpose for Chickens Ducks Bird PoultryKSh20,000.00
128 Eggs Digital Incubator Fully Automatic with Intelligent Temperature and Humidity Control Turning Poultry General Purpose for Chickens Ducks Bird PoultryKSh20,000.00 -
![Egg Incubator Incubators for Hatching Eggs 128 Eggs Digital Incubator Heat Preservation and Water Retention One-Click Heat Preservation Suitable for Chickens, Ducks, Quails]() Egg Incubator Incubators for Hatching Eggs 128 Eggs Digital Incubator Heat Preservation and Water Retention One-Click Heat Preservation Suitable for Chickens, Ducks, QuailsKSh20,000.00
Egg Incubator Incubators for Hatching Eggs 128 Eggs Digital Incubator Heat Preservation and Water Retention One-Click Heat Preservation Suitable for Chickens, Ducks, QuailsKSh20,000.00 -
![Egg Incubator 128 Eggs Fully Automatic Poultry Hatcher Machine with Led Candler Egg Turning and Temperature Control for Hatching Chicken Duck Goose Quail]() Egg Incubator 128 Eggs Fully Automatic Poultry Hatcher Machine with Led Candler Egg Turning and Temperature Control for Hatching Chicken Duck Goose QuailKSh20,000.00
Egg Incubator 128 Eggs Fully Automatic Poultry Hatcher Machine with Led Candler Egg Turning and Temperature Control for Hatching Chicken Duck Goose QuailKSh20,000.00


The post A Guide on How To Get Ready for Egg Incubation appeared first on ECOCHICKS POULTRY LTD.